Showing posts with label judy odell. Show all posts

Sunday, August 19, 2007

I Hope You Dance

I took this picture of My Treasures Workstation (pattern by Just A Thought from Judy Odell) while it was on display during the 2007 National Counted Cross Stitch Show (NCCSS) competition.

Interestingly, this piece received both my highest score (from Betsy Evans), as well as my lowest score (from infamous pottymouth Eileen Bennett). The difference between the highest and lowest scores was 14 points, and based on the two judges' comments, their scores were based specifically on the workmanship of my stitches.


Wednesday, February 07, 2007

Stitching Retreats (2/7/07 SBQ)

Today's SBQ, suggested by Danielle, is about stitching retreats:
Have you ever been to a stitching retreat?

I've been to several. My first stitching retreats were Heart of Cross Stitch and then the Creative Arts and Textiles Show (CATS) in 2000; I attended both in Pennsylvania because at the time, I lived in New Jersey. Unfortunately, 2000 was the last year for Heart of Cross Stitch.

But CATS, whose name has been changed to the Consumer Arts and Teaching Show, is still running, although sadly they've reduced the numbers and locations of the shows offered down to just one this year. However, CATS offers the largest market open directly to stitchers anywhere in the US so is well worth attending just to shop. It will be held September 27 - 29, 2007 at the Hershey Lodge & Convention Center in Hershey, Pennsylvania. You'll find lots more information at the CATS website, which will be updated in the near future with 2007 information. Don't forget to sign up for their newsletter!

As mentioned in previous posts here on my blog, I've also attended other retreats/classes available through the Embroiderers' Guild of America (including opportunities to take classes with the most popular teaching-only designers such as Merry Cox and CA Wells) as well as online classes available through a number of different sources (Elegant Stitch, Swan Sampler Stitchers, Victoria Sampler, Just A Thought from Judy Odell).

sbq

Thursday, November 09, 2006

The Finish!

I updated the picture which was originally here with a better one, which I took of My Workstation while it was on display during the 2007 National Counted Cross Stitch Show (NCCSS) competition. Interestingly, this piece received both my highest score (from Betsy Evans), as well as my lowest score (from infamous pottymouth Eileen Bennett). The difference in scoring was LARGE, and specifically based on the workmanship of my stitches, which is what makes it so very strange. You WILL see further discussion about this on INDEPENDENT NEEDLEWORK NEWS at a later date; right now, I am still working on my research for that post.


Today was a beautiful, sunny, and warm day here. I took advantage of the good light to take some better pictures, so now I can share my finished Workstation with you.

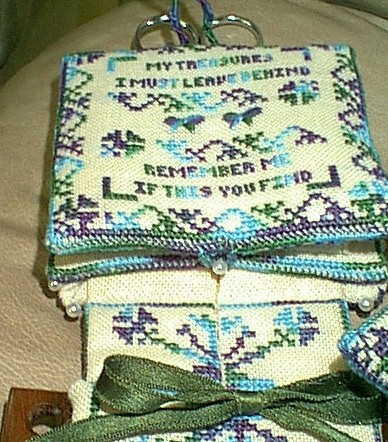
Here's a good picture showing the largest hedebo loop I've ever made, LOL -- the ribbon from the base goes through the hedebo loop and is then tied in a bow to keep the Workstation closed.


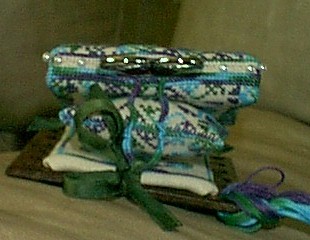
Here's a side view of it closed ... You won't get a back view because I managed to glue my hinge on a bit crooked. ;>) Perhaps someday when I locate my glue gun, I might fix that part (which would also keep the base more securely attached than I think it is right now).


This is the Workstation opened halfway, with the pin cushion removed. My pin cushion is a bit lumpier than I would like, but that is one of the things that makes it mine!


Next is a closeup of the hedebo loop used to keep the needlebook closed.


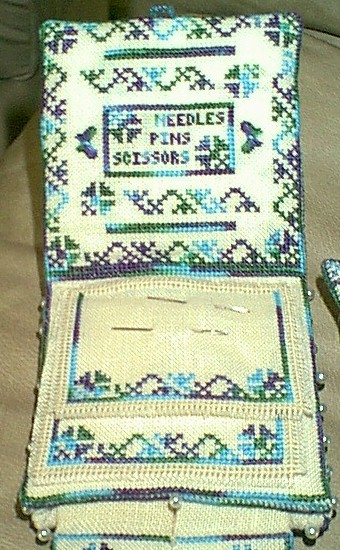
Here is a closer look at the needle pages -- already in use, too!


And last, but not least, a picture of the Workstation opened all the way.


This truly was a joy to stitch! The finishing was much easier than I had thought it would be; Judy's instructions made me feel like I could do anything I set my mind to, and the other stitchers in the class were an invaluable resource, too. I am thoroughly looking forward to finding out what Judy's next class offering will be!

Wednesday, November 08, 2006

Minor Happy Dance

I finished all the stitching for Judy O'Dell's My Treasures Workstation, though not quite in time to really work along with the other stitchers who were finishing their Workstations over this past weekend. Instead, I was lucky enough to be about two days behind them, which meant I got extra clues on what to do and how to do it from them. Thanks to following in their expert footsteps and Judy's wonderful instructions and encouragement, I managed to do all of my finishing (except the pin cushion, which I did the night before to practice the joining stitch Judy used in this project) on Monday. But more on that later.

The hinge was the quickest part of this project for me to stitch, partly because I made no changes to the charted hinge.


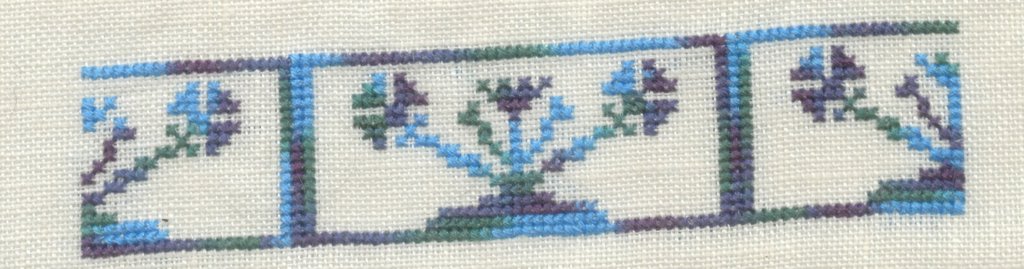
I'm feeling a bit conflicted about my needle pages. During the finishing, I put the smaller (top) one on my Workstation upside down from how the instructions called for it to be (I hadn't realized until my needle pages were already attached that the top one was supposed to go on a different way ... which would have created the image of a square with the top half of the square on the top needle page and the bottom part of the square on the bottom needlepage). Once I figured out my mistake, I wished I had put a row of rhodes butterflies across the top of the smaller needle page to make it look like I did it "wrong" on purpose. In fact, I did consider adding butterflies to the needle pages but figured it would be too heavy of a stitch on my somewhat flimsy fabric, especially for pieces that were going to be loose on three sides. Had I stitched the butterflies across what is my top of the smaller needle page (both needle pages are pictured here upside down from how I put them onto my workstation, so imagine butterflies straight across from the flowers in the blank area, and you'll know where I now wish I had put butterflies), they would have been close enough to where the needle pages attach to the Workstation that they wouldn't have been too heavy ... oh well, I'm certainly not taking it apart now! Actually, I am quite happy with having done it differently than the instructions called for, just because that is another part that makes it uniquely mine ... but I still feel conflicted because I could have made it even more mine. ;>) So, my needle pages are stitched almost as charted (I reduced the size of the four sided stitches around the border to make the finished needle pages look daintier), but the smaller one is installed "wrong." LOL.


And here are the top and bottom of the pin cushion, which would be identical were it not for the variegated thread. I replaced cross stitches with the closed herringbone and rhodes butterflies on these.


The base was the hardest part for me because it involved centering lettering, which, as I mentioned previously, is not one of my strong suits. I did the math, but incorrectly, as I originally intended to include my middle initial until I found while stitching that it wouldn't fit. Then I still had to edit the last letter from the way it was charted; otherwise, I would have had to rip out my last name. (How fortunate I am that my last name is only three letters long! Otherwise, I would have had to center lettering on two different lines, LOL.) However, I am happy with the result, and also happy I was able to center lettering without having to rip it out more than once (I didn't determine that the middle initial was too much until after I had already stitched it) -- I think that is a first for me. The lone rhodes butterfly is my addition to this chart; I thought about doing a few more, but this was the last piece I stitched and I was eager to start the finishing process. (I managed to get the butterfly centered on the first try again. One thing I love about stitching is that I constantly amaze myself, LOL. Woohoo ... I can count! Sometimes, anyway ... )

I'll show you my finished Workstation in my next post. I do have pictures of it already, but am hoping for a less dreary day to try taking better ones. ;>)

Monday, October 30, 2006

Moving Right Along

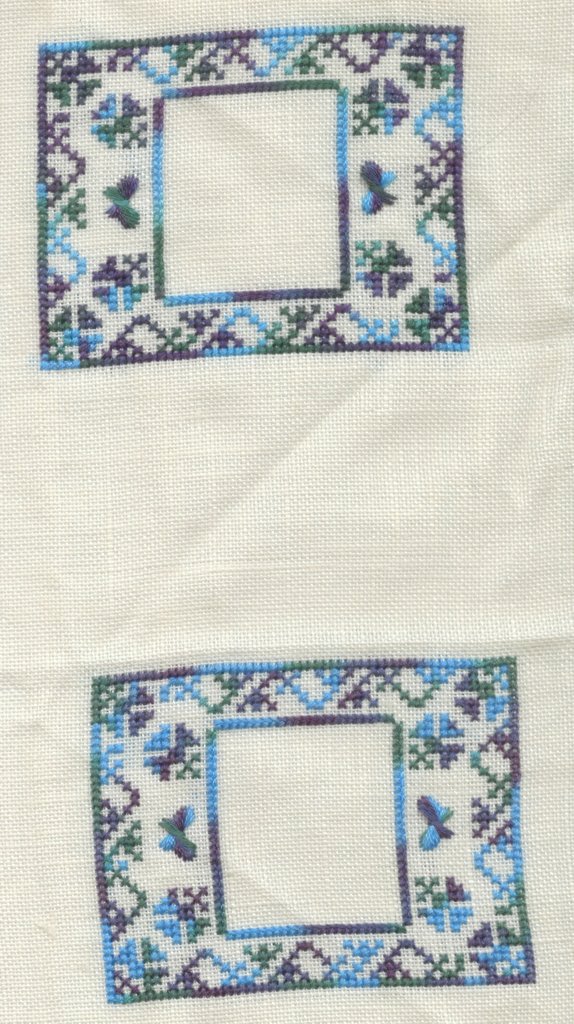
Here is the needlebook outside from Judy O'Dell's My Treasures Workstation. Again, I've replaced cross stitches with closed herringbone and rhodes butterflies.


I'm starting to get bored working only with this fiber, beautiful as it is. However, the finishing class for this project is next weekend, so I'm going to keep going with the stitching!

Saturday, October 28, 2006

Next Part of My Workstation

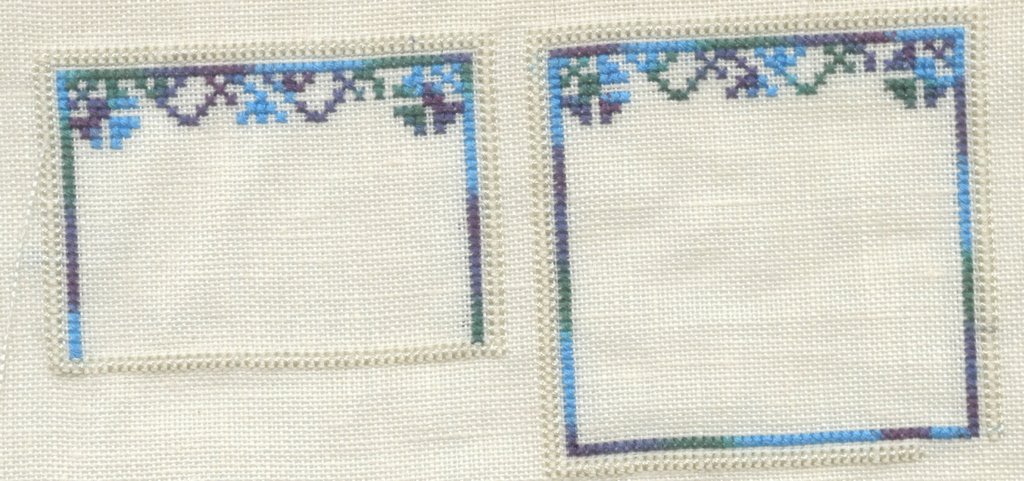
I completed the second part of Judy O'Dell's My Treasures Workstation, which is the inside of the needlebook.

I again switched some cross stitches to closed herringbone, and added rhodes butterflies into empty spaces.

I'm keeping this picture small at Judy's request. I'd love it if you find these pictures attractive enough to contact Judy about taking the class yourself!


By the way, I neglected to mention earlier that I'm stitching this project on Zweigart's 32 count cream Belfast.

Tuesday, October 24, 2006

A Partial Finish

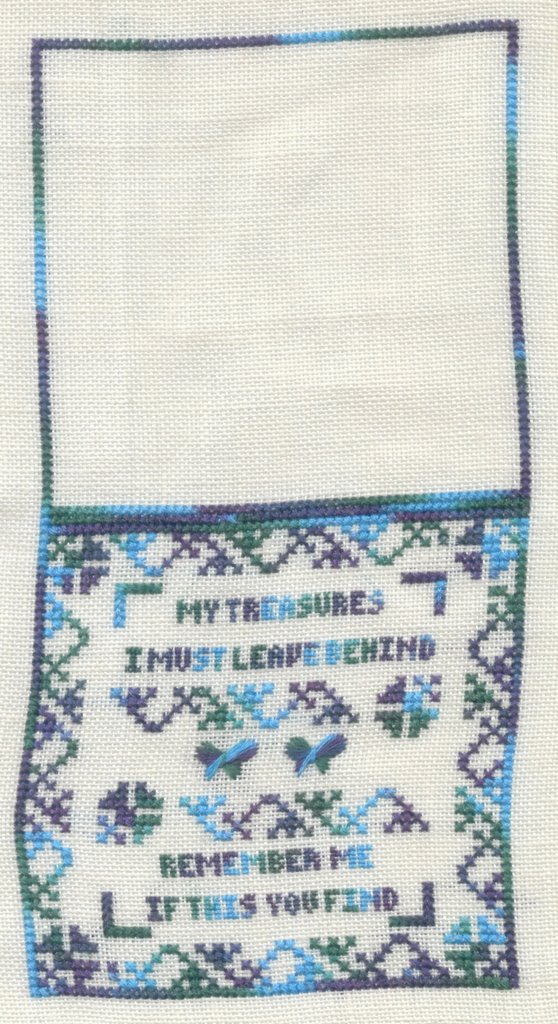
Among other things, I've been working on a class project, Judy O'Dell's My Treasures Workstation.

Although the chart calls for more, I'm using only one thread color (Needle Necessities overdyed floss 183-Jewel of the Nile) and letting its variegation make all the color changes.

The chart calls for only cross stitch, but Judy encouraged us students to make stitching changes, so I elected to use closed herringbone and butterfly rhodes stitches in mine. I'm a butterfly fan and thought butterflies would enjoy the pretty flowers in the original design. I'm particularly pleased with myself that I managed to get the butterflies centered on my first try, as centering is not my forte (perhaps my lack of centering ability is reserved for lettering, LOL).

I finished the top panel tonight:


Now onto the rest of the parts of this lovely design ... I need help from the stitching fairy to get this all completed in time for the finishing part of the class the first weekend in November!

Thursday, August 24, 2006

Blog-worthy

I read and very much enjoy so many different stitching blogs, but I hadn't gotten into blogging myself ... until now ... I finally have something I think is worth sharing through such a forum. I'm just so tickled with myself, LOL ...

My brother made a silver bracelet for me years ago in a summer school art class during high school (or maybe even junior high). Unfortunately, possibly due to my personal hormonal changes (hot flashes started at age 26, but so far none of my doctors have thought it important to look into -- and here I am just turned 37 and sweating-like-I'm-in-the-shower ten or more times a day plus the night sweats), I haven't been able to wear silver for years because it tarnishes when I do. Plus, my hands have grown to the point that I cannot get this lovely bracelet over my knuckles anyway. My brother just got married in June, and for his wife's birthday, I decided to give her the bracelet (with his permission) so it can be appreciated. I consider myself to have been only its temporary guardian. But I needed a pretty box of some kind for it.

So I picked up a paper mache box at Hobby Lobby. I planned to paint it, but that didn't really work out well. The paint was supposed to be a metallic red (red is her favorite color), but it came out flat, and even has a fog-like tinge in places. (I think the problem is that I was supposed to use a particular base coat, but I did not read the instructions that carefully until after I'd sprayed three light coats of paint. By then, I wasn't about to go find the proper basecoat.)
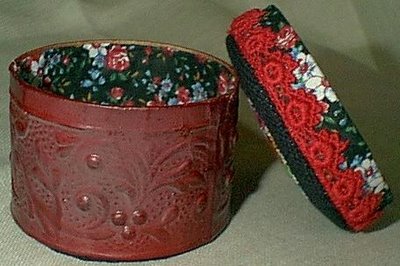
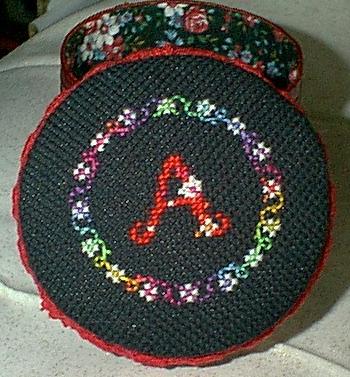
Hmmm. The fog-like tinge made it look old-fashioned to me ... So I ran with that idea and now have something reminiscent of a Victorian trinket box. I stitched her first initial (using a 1998 Framecraft Handbag Mirror and Pouchette pattern called K104 Initials designed by Christine-Ann Martin, my own choice of DMC threads along with Needle Necessities overdyed floss 1931~Calypso, and 18 count black davosa) and then set about trying to finish this little box similarly to Judy O'Dell's instructions for finishing tins.
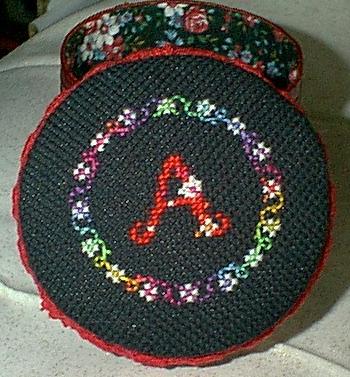


I had to finagle several things because the box is round, because the davosa is a bit thicker than linen, because I couldn't find my glue gun, because I didn't have any batting, because I didn't want to make (or buy) cording (which I wasn't sure would work with the little gap I had between the stitched top and the top of the box itself anyway), and because the box is over two inches deep.

I used Aleene's Original Tacky Glue for everything, stuffed the stitched parts with Poly-Fil, laced the stitching for the top of the box to make it as compact as possible, whip-stitched the stitched top to the lining fabric (after gluing the lining fabric on), then whip-stitched the red lace around as trim. The lining fabric was something I've had for several years which I thought worked really nicely with the stitching, the not quite metallic red, the original flowery pattern on the paper mache box, and the red lace. The red lace was something I've had for many more years, perhaps even handed down from my grandma's sewing box!

The only part I'm not completely happy with is the lining fabric on the inside of the box. As you can see in the pictures, it puckered a little bit, although the pictures make it look worse than it actually is. However, for my first attempt at something like this, I think it turned out really, really well.


I've only once ever done anything with my stitching other than frame it in some way (or leave it to be framed or otherwise finished later, LOL), so this is a really big deal for me!


Now I have to make one for myself, ha ha!