Showing posts with label happy dancing. Show all posts

Tuesday, October 02, 2007

An Unexpected Gift

Karen Pierce, with whom I have not gotten along, wrote this as a comment to one of my recent posts:
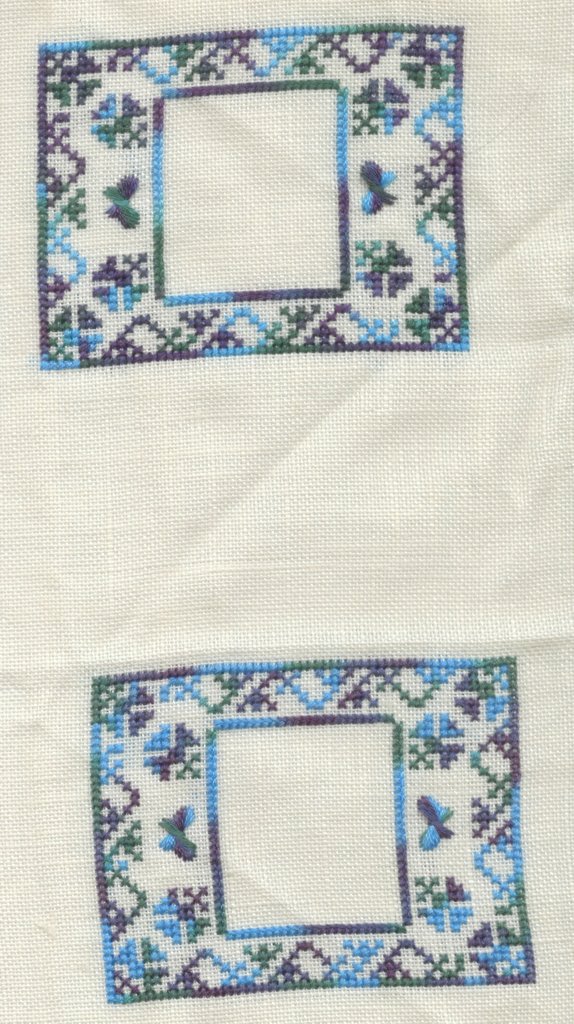
Very sad. I have such a distrust and dislike for the medical field. We're at their mercy, and more and more it's becoming clear that there are a lot of "medical professionals" who should not be trusted with our care.

My sympathies to your family, Heather.

Her note is lovely, and although I wanted to write her to say so for days, I just couldn't take her sympathy note with the sincerity it was intended because of the history between us.

And that was sad -- really sad. Because maybe Karen was truly affected by what I wrote about how horribly unnecessary, undignified, and inhumane Dad's death was. It was a death which simply should not have happened -- not then, and certainly not that way, that is. Maybe Karen's sympathy note was for real -- an honest expression I could trust. Maybe she was reaching out to me, for the first time, in kindness, which would be a good thing I should encourage. Maybe it was a moment which could have turned our "relationship," (for lack of a better word) around, and yet, I was ... afraid. My thickened skin didn't trust her, or the way she reached out, or what her motives might be.

I kept thinking about these things. Was I being fair to Karen? Was I being fair to me? I wasn't sure. I did realize her words touched me enough to wish I felt safe putting faith in them.

So, I wrote this post, and although she was much the focus, it wasn't just about Karen because there are a lot of other people out there in the online needlework world tossing around cruel words without a second thought whom I hoped to at least encourage to have a second thought the next time they do something like this -- to anyone, not just me.

I have now edited that post because earlier yesterday evening, I received a surprising email from Karen in which she stated the comment she wrote in sympathy about my father-in-law was not only sincere, but also intended to put the past where it belongs -- behind us -- and to initiate a truce. And Karen said she still wanted to initiate a truce.

I emailed back suggesting we talk by phone, thinking if we could each hear each other's voice, we would be able to hear sincerity from each other much better than through email. I also gave her my phone number.

Just minutes later, the phone rang, and Karen and I laughed and occasionally teared up through a wonderful and quite lengthy conversation. We apologized to each other for our past disagreements and mean comments, and we really started talking with each other about who we are as individuals. In doing so, we quickly discovered several fairly unusual things we have in common. We were both prepared to be not only forgiving, but also open-minded because each of us had taken a step on our own in a vulnerable direction -- Karen with her email requesting a truce, and then me by giving her my phone number. Now we have an actual foundation -- and a fairly firm one at that -- for a real friendship.

Our past disagreements seem so silly to us, especially when neither of us can remember what it was that first triggered them. Why not let those things go? Why not be friends? Maybe not bosom buddies, but at least friends who can appreciate each other's stitching and be kind to each other ... I think we both felt a lot better about ourselves after the phone call.

There is so much else going on in the world -- things I don't have to remind anyone of, I know, but things which are actually causing loss of life because other people in allegedly more important positions can't be bothered to admit their mistakes, or sit down and talk with each other while treating each other like human beings and with a modicum of respect. I think about those other things going on in the world every day, and I'm quite active politically as far as contacting my Senators, Representatives, etc., to let them know what I think they should do to resolve things. Most of the time, I don't feel like I'm very effective at making anything happen.

But when I received Karen's email, and then her phone call in response to my email, and as we talked, I did feel like maybe I could actually cause some real change, at least in what is my little part of the world. I mentioned this to Karen, too, that we could set a different example by being the first -- but hopefully not the last! -- to STOP the meanness, which reminded me of a quote I'd read earlier this week somewhere:

A small group of thoughtful people could change the world. Indeed, it's the only thing that ever has. ~ Margaret Mead
Contrary to our usual perceptions, a gift is always unexpected, never obligatory. I think sometimes we forget that in our materialistic world where we feel we "have to" give so-and-so a gift for her birthday or on Christmas. Such is not the case; we always choose to give a gift, and that choice is what makes the gift so special.

Friendship is perhaps the greatest gift of all. Thank you, Karen, for offering me the gift of friendship.

Monday, October 01, 2007

One of My Most Recent Projects

It's really hard for me to do a happy dance for this piece.

It's by Debbie Rowley of DebBee's Designs, and is called Holiday Highlights Father's Day; the copyright date is 2006.

I stitched it on Zweigart 28 count potato lugana with the charted colors. By the way, if you don't stitch the words "tools," "naps," and "ties," you don't need Crescent Colours Roasted Chestnut at all for this one.

If you stitch this piece on evenweave or linen, I highly recommend making a few of the specialty stitches on the equivalent sized aida first (14 count aida for 28 count linen or evenweave; 16 for 32; 18 for 36) so you know how big to make your stitches on the evenweave or linen. When the whole piece is specialty stitches, as this one is -- and specialty stitches that are new to you and don't involve making any part of a cross stitch, to boot -- it's pretty difficult to determine what is considered over two and what is over one. Or at least, it was for me. I had a heck of a time with that part and could have saved myself hours -- and a lot of frustration -- if I had just picked up a small piece of aida and done a few test stitches. Seriously, it would have taken just minutes to save me a huge amount of time.

As it was, I started off stitching it too small at what turned out to be over one -- and I got a lot of the stitching done, but as you can see, the really neat pattern which is supposed to be created by Debbie's design just doesn't really show up very well (and that's what finally made me decide I must be stitching it too small and needed to start over). I think it would have been fine if I'd been using just one thread, but since I thought I was stitching over two, I was using two threads. I haven't decided if the first attempt is going to get frogged or trashed -- these stitches are in there pretty tightly, so ripping them out won't be easy ... but I do hate to throw away a good piece of fabric.


After a second start, I got the count right, though I still had a bit of difficulty with each new section. Grab a piece of aida for this one, I tell you (not to stitch the piece -- unless you want to use aida, of course -- but just to test drive these stitches ... don't be stubborn like me!)! Maybe five or so hours later, I was done.


This piece is really attractive in person, and I think I will probably end up making more for the other men in my life. I find men are really difficult to find the right patterns to stitch for but this pattern is perfect (especially with the opportunity to change colors) ... but I'm just not ready right now.

You see, I made this for my father-in-law, Dad, for his retirement on August 31, 2007. When he died, I was working on finishing it off into what could be used either as a bookmark or hung up as a small bellpull (those are four-sided stitches all around; I planned to use CA Wells' joining technique to attach a second piece of lugana the same size as the back). Dad did get to see it because I took it to the hospital to show him; I can't remember if that was a day by which I pretty much knew he was going to be leaving this world, but I do remember feeling a need to take this to show him -- it was finished except for what I wanted to do with the back and stuff. Only when my DH and I got to the hospital, my DH's sister, who had been visiting her dad all day, wouldn't come out, so that meant I couldn't go in because the number of visitors Dad could have at one time was limited. So I gave this to my DH to show to his dad. I actually never got to see him alive again.

After Dad died, I wasn't sure at first what to do with it. I knew there were several people I could give it to who might like it, including my DH, but that just didn't feel right. I wanted to make DH his own ... not give him the one he knew would have been his father's. Giving this to anyone else just didn't feel right; I made this for Dad, and in the five years of my marriage, it's the only thing I'd ever stitched for him. I wanted him to have it.

So at the visitation, I asked my mother-in-law if I could put it in with him, and she took it from me and put it on the pillow next to him. I would have put it somewhere a little less prominent, but I'm glad it's with him. Well, I know it's not really him, but you know what I mean.

Still, it's not in a happy dancing place ... even though I know Dad is.

Sunday, August 19, 2007

I Hope You Dance

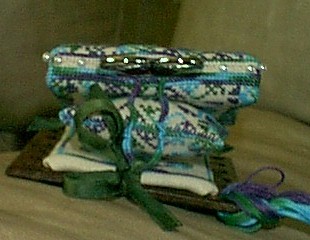
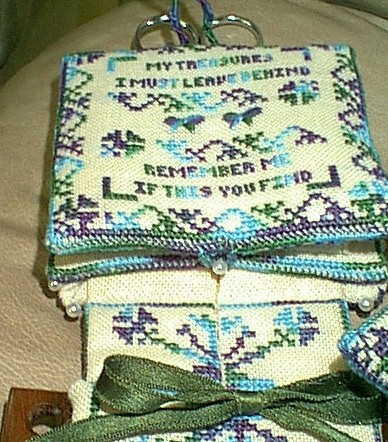
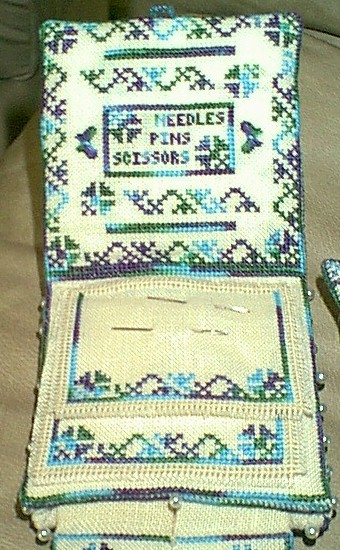
I took this picture of My Treasures Workstation (pattern by Just A Thought from Judy Odell) while it was on display during the 2007 National Counted Cross Stitch Show (NCCSS) competition.

Interestingly, this piece received both my highest score (from Betsy Evans), as well as my lowest score (from infamous pottymouth Eileen Bennett). The difference between the highest and lowest scores was 14 points, and based on the two judges' comments, their scores were based specifically on the workmanship of my stitches.


Sunday, August 05, 2007

Official Announcement

INDEPENDENT NEEDLEWORK NEWS is now up and running.

For me, that counts as a happy dance!

Thanks in advance for all publicity or word of mouth!

Monday, April 30, 2007

I'm Really Proud ...

of this.

Tuesday, January 02, 2007

A Merry New Year

Merry Cox, that is. I completed the stitching on my other optimistically dated project, the sampler from Merry Cox's A Diminutive Sewing Set (copyright 2005), very early the morning of January 2nd.


I'd been working on it for several hours on New Year's Day and wasn't willing to put it down until I finished it. So, my optimistic date is off by about 26 hours, which is okay with me even though the sampler just says 2006. Additionally, since my birthday occurs mid-year, this was technically stitched during both my 36th and 37th years of age, but you may notice I didn't bother making any correction or addition for that fact either.

In my opinion, neither of those two "errors" is nearly as annoying as how obvious this particular design makes it that I am truly lousy with centering lettering -- and even that doesn't bother me all that much on this piece because it's just too pretty not to love. ;>) Actually, I wasn't really trying all that hard to center the lettering because I was sort of winging things by stitching as I thought of something appropriate rather than truly planning ahead. If I were to restitch this piece, though, I would stitch the border first, which would have given me better guidance in terms of stitching the lettering. I stitched the border last because I was so eager to get right into the heart of the design.

Keeping in mind
my experience working in tent stitch on Birds & Berries, I chose to stitch the lettering on this piece in cross stitch instead of tent stitch. Both pieces use the same fiber for the text, Gloriana Winter Woods, and are stitched on the same fabric, Wichelt's 32 count sandstone linen, so you may find it interesting to compare the way the text looks different between the two.

I made several changes to this piece from the way Merry charted it. In some cases, my changes resulted from stitching errors on my part. For instance, I went with a simple back stitch border rather than the feathery border Merry designed because I didn't correctly determine where the left side needed to be, meaning I either had to frog or make a design change. I miscounted somewhere while stitching at least the stems and leaves (and perhaps the flowers, too, which I stitched first) in the bottom portion of the design; after that, I used the chart as a guide but stitched it such that things looked good to me.

I also made intentional changes. Where I have "Squirrels Nest Getaway," Merry had charted another slightly different alphabet; admittedly, I was a bit tired of stitching alphabets at that point, even in such a gorgeous color. At the bottom, I used my blog name as inspiration instead of stitching, "a gift for [insert name]" -- because I'm not letting this one out of my sight, LOL. I extended the sampler bands of specialty stitches to fill in space where Merry suggested putting one's initials, since the sampler would already have my full name on it.

I don't know why Blogger has made this picture so small, but if you'd like to see it bigger, just click on the picture.

Now to decide what to stitch next ...

Sunday, December 24, 2006

DH's Gift

Sunday was a somewhat sunny day, which allowed me to take pictures ... and we've done our gift opening now, so I can share what I made for DH with you (not that he reads this, LOL).

Merry Cox has several patterns for pocket watch samplers available on her website (under Kits and Charts). While I was taking classes with her in Indianapolis this year, I decided to buy the one called My Beloved, copyright 2006. I love the idea of wives making tiny samplers for their husbands pocket watches to bless them while they are away from home and remind them how much they are loved.

My DH isn't allowed to wear a watch (or any jewelry including his wedding ring) at work, which he really misses; however, he can carry things in the pockets of his pants. So this is a perfect gift for him. I picked My Beloved because I liked the colors in that kit best, and also because we used the wording "my beloved friend" to address each other in our wedding vows.

I made changes to the pattern to incorporate the wording from our vows and to commemorate this as a Yule gift. I like the way "good" works with both "friend" and "yule" in the finished product. I have no idea how I managed to get the lettering centered so nicely the first time, but I'm very happy about that as frogging over one stitching done on 40 count fabric certainly isn't any fun. ;>) The pictures show the stitching closeup, and then mounted inside the pocket watch.

I hope to have one more stitching finish to share with you before the end of the year, as I found another optimistically dated project from a June Merry Cox class -- and I do not intend to frog it, LOL.

Saturday, December 23, 2006

I'm Scared of My Sewing Machine

Back in February, I took several classes with Merry Cox through Lake Michigan Sampler Guild (LMSG). Although those were the first and only classes I have taken through LMSG, they definitely will not be my last. I am so thrilled to have a guild which offers such great programming within a few hours of me!

They were my first classes with Merry Cox, too, and I liked her so much I took classes with her two more times during the year (in Cincinnati and in Indianapolis). She is a wonderful teacher and designer, and a delightful person, too.

Like many of Merry's classes, the class for this particular project was intended as a finishing class. Although I had worked on pre-stitching the piece, most of Merry's designs involve a LOT of stitching -- and most of that is over one -- so I just didn't have it done in time. Thankfully, her instructions are fabulous, so once I get up the nerve to face my sewing machine, I think I'll do just fine. In the meantime, I worked on this project on and off throughout the year and enjoyed every stitch. I just finished the stitching early this morning because I had optimistically put "2006" on it way back in February, and with it's pretty yuletide colors, it was really nice to work on again at this time of year.

So, this is my version of Merry Cox's Birds & Berries Sewing Case, copyright 2003. Merry encourages stitchers to modify designs in order to personalize them, and one of the benefits for me in not having my stitching completed prior to class was being able to see what ideas other stitchers had come up with to modify this project. As I so often do, I made a number of mistakes while stitching this design, one of which was a counting error when I stitched the first (right-hand) bird on the front of the sewing case. I didn't notice my error until I was finished stitching the bird and trying to figure out why it didn't look like Merry's.


The bird, being stitched over two, could have easily been frogged and restitched as charted, but it occurred to me that it's head looked like that of a cardinal. I spent most of my middle school and high school years in St. Louis, Missouri and was, therefore, a Cardinals baseball fan, so I decided to use my stitching mistake to purposely personalize my sewing case. Since the first bird is clearly a female cardinal based on her coloring, I used the deep red thread Merry uses for the berries to stitch a male cardinal, too. I think he's quite handsome and am very proud of myself for coming up with such a good result out of a stitching mistake. ;>)

Below is a closeup of the front of my sewing case, and if you'd like to compare, you can see a closeup of how Merry stitched the front of her sewing case here.


I only used Merry's chart for the branches, leaves, and berries as a general guide while stitching mine. After deciding not to stitch the branches so they hang all the way down to the ground, as Merry did, I filled in leaves and berries until I was happy with the way everything looked.

Here is a closeup of the back of my sewing case. Another stitcher in the class had done full cross stitches for all of her stitching, while Merry's chart calls for tent stitch for most of the over one stitching and I had followed Merry's direction. After seeing the other stitcher's work, I wished I had done full cross stitches also. I probably would have gone back and made full cross stitches -- at least for all the lettering -- if I hadn't already done so much of the lettering in a strongly variegated thread.

However, Merry told us one of the reasons she uses tent stitch is because when she studies antique samplers and other stitching, she notices there has been a lot of thread loss; the tent stitches definitely do mimic the way an antique piece with thread loss looks. You can see the effect Merry is trying to create especially well in the sampler-style alphabet on the back of the sewing case. This alphabet is stitched in Gloriana Winter Woods, a variegated thread whose colors sometimes almost disappear on this particular fabric.

Learning Merry's reasoning behind her use of tent stitch makes me glad I used it, too, at least on this one piece. (Well, I will stick with tent stitch for the rest of the Birds & Berries set so they match each other.) However, in the future, I will probably do full cross stitches on Merry's designs, especially since Merry confirmed she includes plenty of thread in her kits so that I can do this if I wish.

The text as charted for the back of the sewing case was, "Wrought this ___ day of (month) (year)," but since I'd already put "2006" on the front, and since the stitching took well over a day, I stole another class student's idea to commemmorate that I'd taken this as a class through LMSG.


Here is a picture of the holder for the needle pages. I changed the color of the thread for the herringbone stitches from the same blue used in the nun stitches to the color used in the vase on the front of the case just for variety.


And here is what will be a little pocket inside the sewing case. I made this cardinal another male, changed the herringbone stitch color for variety again, and stitched a tiny little "39" because I thought this looked like a postage stamp. Now I will always have something to remind me what it cost to send a first class letter in the US in 2006!

Now, I just have to work up the courage to approach my sewing machine to finish this project into the actual sewing case. I titled this post as I did for a reason -- I need support, LOL. I had a run-in with a sewing machine in Home Economics in 5th grade that scarred me for life -- mentally, at least, LOL. I originally bought my sewing machine to zigzag the edges of my cross stitch fabric, but have barely used it even for that. (I also had some thoughts that I would start doing small machine quilting projects -- mostly things I could then embroider on, i.e., crazy quilting.) Instead, I tend to reach for Fray Check. It's been so long I'll have to pull out the directions for my sewing machine just to thread it and wind a bobbin, and I'll be crossing my fingers while the bobbin winds that I'm doing it correctly and don't screw up the machine terribly. All I have to do (I think) is sew a few straight lines -- albeit on really expensive silk, ha ha.

On the other hand, I took this class, so I know I can do this. While I haven't had enough practice with a sewing machine to feel confident I can sew in a straight line with it, I know I have plenty of inexpensive fabric with which I can practice. At least until I try, I refuse to pay a finisher to do this when I have such excellent instructions to work with and all the supplies I need (well, okay, I'll probably have to go shopping for thread that matches ... but it's not like I don't have a sewing machine).

Plus, I am fortunate to have a really wonderful finisher among my friends, and she's so good she can probably undo almost anything bad I could do to this project while trying to finish it myself. If that's not a confidence booster, I don't know what is.

It will be a little while, though. With the inspiration of wanting to see this lovely project finished into a little sewing case, I could get up the courage to at least try fairly quickly ... but it will take some time before I can clear out my craft area enough to be able to set up my sewing machine in order to start, especially as I'm still dealing with a back injury.

Anyway, I hope you enjoyed the pictures of this one so far, and I hope to bring a finished product to you sometime before, say, spring. ;>)

Friday, December 22, 2006

Yule Project

My husband's gift is done, but I need a day with good light to take a picture of it before I can share it with you.

Wanting to stitch rather than work on finishing Brightneedle's Lady's Collection yesterday, I started and completed a fun little project: The Orange Brew Bag, copyright 2006, from Shepherd's Bush. This came as a kit with the already made burlap bag, which was somewhat difficult to stitch on because it's rather small, making it difficult to get my hand inside. I'm usually a stab stitcher, but I quickly gave up stabbing on this project and sewed instead. Texture-wise, the burlap wasn't all that pleasurable to stitch on, though it reminded me of an early stitching project I did in grade school on similar fabric. I tied the moon button on by making a bow from two of the threads that came in the kit and like the effect; I'll have to use this technique again.


I'm not sure if or how I'll use this bag, as it's not very big. I had something in mind for it, but it's too small, so for now, I'll just admire it. ;>)

Tuesday, December 19, 2006

Finished Stitching At Last ...

Yes, that's right, I've finished all the stitching for Brightneedle's Lady's Collection. Here are the needle pages.

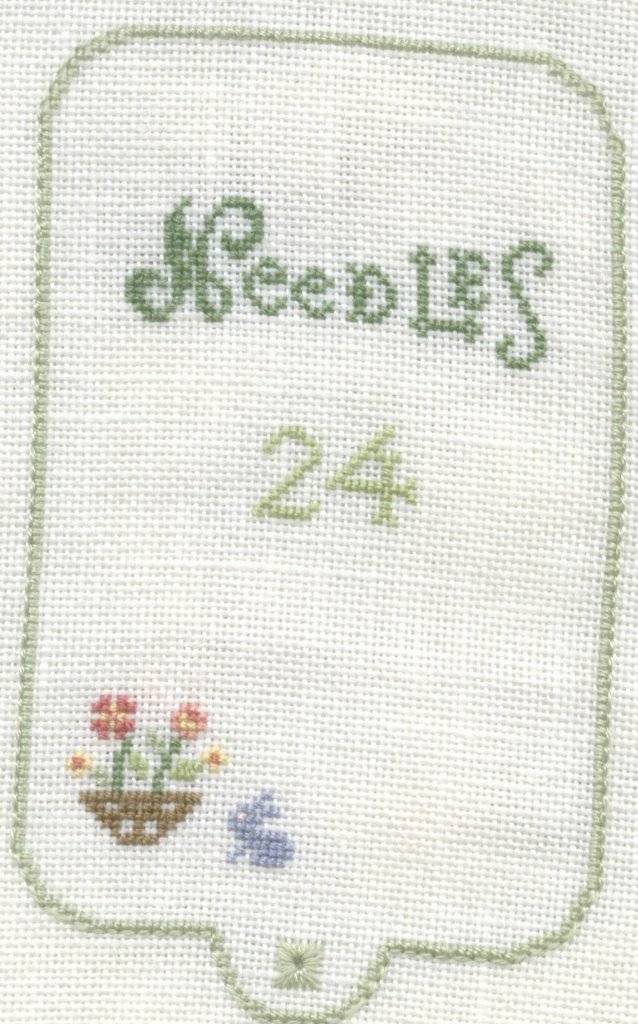
First, the little periwinkle bunny with pinkeye is back, and he's eating the flowers! This is my favorite piece in this project because I love the humor in it.


The thread color used for the numbers is different than what was used previously in the chart -- I wonder why ... I was surprised this very pale green color shows up as well as it does.


I'm very happy with how the buttonhole stitches, which are the darker spots at the top and bottom of each needle page, turned out.


I'm curious to see how easily (I'm feeling optimistic now that the stitching is done) this project will go together during the finishing process, but I won't be getting to that right away. Next up is DH's Yule gift, which I've obviously left until almost the last minute, but fortunately it should be a very quick stitch (just wait ... you'll see! ;>). I hope to get back to this project and get it finished before the end of the year.

Almost Done!

Finally, you can see some of the yellow in the scissor case pieces of Brightneedle's Lady's Collection! (The shadow stitching you can see behind is because I folded the material to get this onto the scanner, and there's a stitched piece folded right behind this one.)


There are a lot of different colors in the little pin cushions, which don't show up well ... I still wonder why the designers did things the way they did. (Same deal going on with the shadow stitching.)


And more yellow:


Monday, December 18, 2006

Another Project Framed ...

There is more progress on Brightneedle's Lady's Collection; in fact, I'm almost done with the stitching. I was sidelined for a few weeks by a nasty cold and then a pulled muscle in my back, but I'm back to stitching again.

However, what I want to share with you at the moment are these little guys:


This is Black Sheep, copyright 2002, by Joy of the Needle. I stitched it using the three (yep, just three!) DMC threads called for in the chart on 28 count China Pearl Jobelan from Wichelt.

I actually stitched this while on pain killers post-surgery a year ago with the intention of it being a gift for someone last Christmas. Then I wasn't really up to framing it, and wasn't allowed to drive to go frame shopping for a while anyway, so it will be a gift this year.

I just love the frame, and it even came with the mats. The colors went perfectly with the thread colors used in the design. I'm really happy with the way it turned out, although I discovered while trying to center the stitching in the frame that I had apparently cut one of my fingers on the glass ... I rushed to get it into the frame without leaving any telltale bloodstains, LOL. As a result, it's not as well centered as I'd like, but that fits the design, and so I've left it this way.


Sunday, November 19, 2006

Increasingly Annoyed

I'm continuing to work on Brightneedle's Lady's Collection. Unfortunately, the more I stitch on this, the more I seem to be finding to complain about, and although I'm sure I'll appreciate the finished project, I think I'll be most happy to be finished with it.

I'm increasingly disappointed with Brightneedle's color choices. So far, everywhere it's been charted that I use yellow in this project, it's too pale to really show up in the finished stitching. Where you can see yellow in the scans, you see it better in the scan than in person ... and you don't see it at all in some areas, even in scans. Overall, I think several of these color choices, when stitched in close proximity to each other, tend to make the piece look washed out, at best, or dirty, at worst.

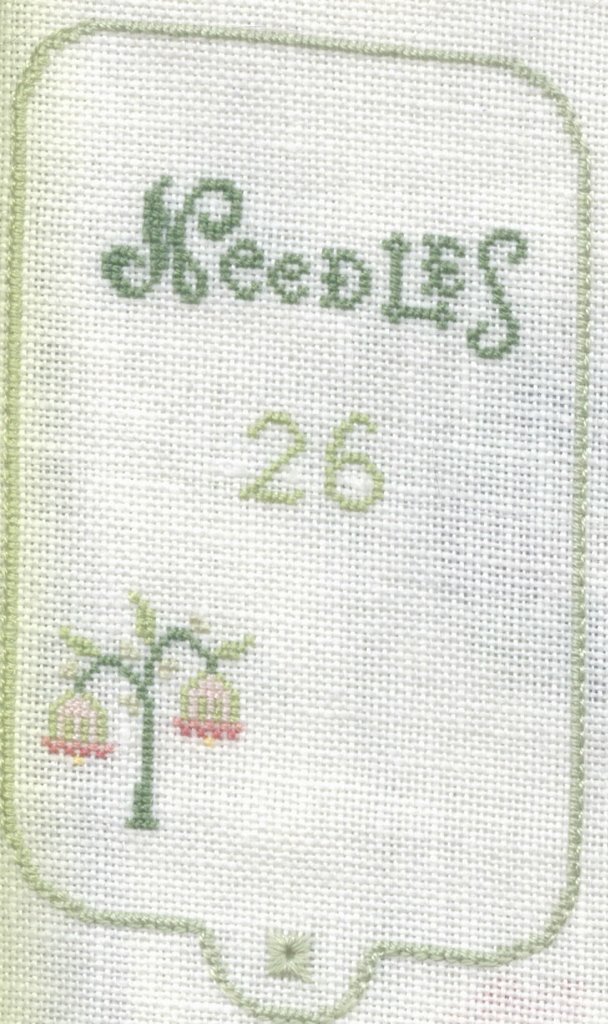
Here are the next two pieces of this project. On the first one, I ended up off center with "Needles" by two threads, and then purposely put "26" off center to make it less noticeable. (So, why am I telling you? LOL ... ) Also, there' a big linen slub right in the center of the round part of the "6," which annoys me.


On the next one, the "28" is a thread or two higher than it should be because I goofed while stitching the "2" but didn't notice it until I was halfway through the "8." I only ripped out the "2," though, and stitched it again as charted but slightly up of where it should be so that it would go properly with the "8." And I noticed that the green silk didn't stitch smoothly in the "N" -- see how it looks sort of blurry compared with the "N" in the 26 piece above? Some of that is the fault of the linen because the thread between the left and right side of the "N" was extremely thin, but I'm still unhappy these NPI silks seem so inconsistent. (Especially when their price is about to go up per skein from $2.70 to $3.70! Sorry, but I just don't see the quality I require to justify even their current price compared to other silk brands -- or cotton brands, for that matter.)


You may have noticed I'm suddenly complaining about the linen in this kit. I don't know anything about it, other than that it is supposed to be 32 count, as no information was included about it in the kit other than regarding the count. I also don't know whether it was Brightneedle or Elegant Stitch who kitted this project. However, I definitely know I'm not impressed with this linen. There's even an area, which fortunately ended up falling between two stitched pieces (instead of inside one where it would have significantly messed with my stitching), where three horizontal threads merge into one -- and stay that way.

On top of it all, this linen is cut too small for my preference. I've been using an 8-inch Q-snap, and as anyone who uses any size Q-snap knows, you need more than an inch of fabric available to wrap around it. There's not enough for that here, so I'll have to resort to a hoop or stitch in hand for the rest of the pieces (and I'm going to have to turn my fabric the other way to fit them all on, which could make things a bit difficult when it comes time to do the finishing work). I'm not going with the option of using another piece of fabric because I don't feel like dealing with the hassle of finding fabric that matches this one well enough, and I'm certainly not going to ask for another piece of this rather crappy linen.

I wonder if today's complaints were affected at all by the fact that I was watching Hacking Democracy while stitching? I jokingly described this very important documentary to a friend as a horror movie because it certainly is horrifying, and that's regardless of your political persuasion. I would highly recommend this very interesting documentary movie to all Americans. I now understand much better what I should be looking and fighting for in order to achieve a voting system in which my vote is truly secure and actually counted.

I hope you are enjoying whatever you're stitching on right now a lot more than I'm enjoying this project!

Thursday, November 16, 2006

This Bunny Needs Colored Contacts

I've got progress to report on Brightneedle's Lady's Collection with completion of the next two parts.

Stitching my initials went 66% smoothly ... I had to restitch my middle initial because it wasn't centered between the other two. But a 66% success rate centering lettering correctly the first time is a definite improvement for me!


I'm still not thrilled with Brightneedle's color choices for this design. I really like the periwinkle bunny, but why does it have "pinkeye"?

Monday, November 13, 2006

Current WIP


I am currently working on Brightneedle's Lady's Collection, which I got through Elegant Stitch earlier this year. I didn't make even one stitch in it before or during class, but I loved the design so knew I'd get to it.

Now that I've finished stitching two of the pieces, I'm sadly not quite as taken with it. I still love the design, but I'm not really enthused with the color choices and especially with the way Brightneedle chose to mix some of the colors together in the design. Makes me wish I'd gotten the chart second-hand and kitted it myself, though I suspect I would have kitted it as called for in the chart and then figured out I didn't like the colors the same way I have now.

In any case, here's the first part. I really don't like the mix of two different greens in the little girls dress -- and they're similar enough to each other that rather than seeing little dots of a different green within the other, it looks like her dress is stained. There is a lot more pink in this design than I had realized, too, and I'm not normally a huge fan of pink. I actually do like these pink shades, but definitely NOT with the lighter green shades in the design. As a teenager in the preppy eighties, I got tired of pink and green together a long time ago. But the main thing I dislike about the lighter shades of green in this design is that they look like ... flourescent snot. Perhaps, since I list green as one of my favorite colors, I'm just too picky.


I'm also finding I'm not thrilled with NPI threads either. This is the first time I've stitched an entire project with them, and I'm not liking the way they lay on the fabric. Sometimes, the stitches look bunched together, and other times they lay neater. The color doesn't seem to make a difference, as sometimes the color lays nicely in one area but not in another. I figured it must be something I was doing, but even when I'm very careful to let my needle dangle and unwind every few stitches, it's not preventing the bunching -- and when I don't pay as much attention, the threads might lay just the way I want. Maybe it's the fact that this project is all over one, but I haven't had the same problem with silks of other brands even when I'm stitching over one. Hmmm.

Here is the second part. There are numerous errors in this one, but I decided not to frog and restitch. That's partly because frogging over one stitching is such a pain, partly because this project was kitted with a minimum of floss to begin with, and partly because I'm no longer as happy with the project as a whole. Plus, I resort to my usual excuse that any mistakes make the work mine. I frequently try to make a mistake work in a design instead of ripping it out; this design is no exception to that rule of mine, LOL.


This project is stitching up much more quickly than I thought it would, though. The above two parts are the most stitching-intensive. The rest of the parts may start to bore me, as they are rather repetitive. Hopefully, the fact that there isn't much stitching on each one will help me get this done quicker, as I'm already eagerly looking forward to stitching something else, LOL.

Saturday, November 11, 2006

Two Previous Finishes Framed

Since I had my iron and other finishing supplies out from working on finishing My Workstation, I decided it was time to frame two earlier finishes from this year. I'm far from being a professional framer, but professional framing is so expensive (and I'd rather spend my crafting money on stash!), so I frame whatever I can myself. I'm really happy with how these two turned out.

The first is something I stitched for my brother, who is a non-smoker and very vehement about his dislike for smoking. Our parents (with whom I no longer have any contact because they couldn't be bothered to come to my wedding) are smokers, so seeing this stitched and hanging in his house will probably tick them off to no end, but I stitched it out of respect for my brother's feelings on the issue, as I am a smoker, too. (I'd really like to quit, but my husband smokes, and anyone who has ever lived with a smoker knows how difficult that can be. Trying to live with and sleep next to someone who smokes and does not want to quit when you really do want to quit is probably more difficult. One of these days, I think I will give it up for good anyway, but I am not quite there yet. However, being a stitcher is great encouragement -- the more I stitch, the less I feel any desire to smoke because my hands are already busy.)

Anyway, here it is. It's from a Dimensions Sunset Jiffy kit, "Don't Think About It" #16723, copyright 2001, which I found on eBay some time ago at a great price. I stitched it using the 14 count aida and floss included in the kit and wish I had switched the fabric out to evenweave or linen. I really dislike stitching on aida after trying other fabrics (95% or more of my UFOs are such because they are started on aida from before I discovered evenweave and linen). I have several friends who stitch almost exclusively on aida that I should automatically mail any aida I end up with to, but when I started stitching this, I just went with what was included in the kit rather than looking for another substitute. However, I'm quite happy with the way the entire thing turned out. The pre-cut mats were things I had on hand that I thought worked perfectly with this design. I also had the frame on hand, but it was too big to show up when I put this on my scanner; imagine just a simple wood frame.


The second piece I framed is a NeedleMagic, Inc. kit, #3179 Mermaid, on which I don't see a copyright date. I did switch out the aida in this kit for a piece of very pale green evenweave I had in my stash, but stitched it with the threads included in the kit (which are about the size of #12 perle cotton). These threads weren't all that nice to work with, although I like the effect now that this project is finished. I found the frame at Hobby Lobby and bought several during a half-price sale because I liked them so much. I thought it would be perfect for a mermaid with the little pearls around the edge. Somewhere, I have another tiny mermaid project to stitch, and I'm fairly certain she'll fit into one of these same frames.

One secret I've learned for framing is to use a piece of light-weight iron-on interfacing on the back of my pieces first. This helps me get the piece squared off straightly, and often adds just the amount of padding I want so I don't need to use thicker foam board (which is often so difficult to fit into a frame); I can, of course, use thicker interfacing if I want more padding. Once I get the interfacing cut exactly the way I want it, I work with it on the back of the piece until it's ironed on exactly how I want it. Then, it's easier for me to tell when things are correctly centered on foam board/poster board, and within the mat(s)/frame. Also, if the fabric I used for stitching is smaller than needed for lacing, the interfacing holds the stitching in place and allows me to "cheat." Neither of the pieces I'm showing you here is laced because the fabric wasn't big enough to begin with; instead, I cut both of them to fit my (sticky on one side) poster board backing exactly. I've heard criticisms about the sticky stuff, but haven't had any problems myself; your mileage may vary of course. I do stick with acid-free materials as much as I can, and I use the sticky side to wrap the edges of my fabric around vs. putting it on the back of the piece whenever I can (i.e., when the fabric is big enough). And when I don't have enough fabric to work with, as in these two pieces, I hope the interfacing will help protect my stitching. I'm also not concerned with most of my stitching outlasting me -- I stitch for the pleasure stitching gives me in the present and frame things so they should hold up well during my lifetime. If they last longer than that, great, and if I ever stitch something I really want to last longer than I will, I'll probably handle it differently, but so far, these methods are working for me.

Thursday, November 09, 2006

The Finish!

I updated the picture which was originally here with a better one, which I took of My Workstation while it was on display during the 2007 National Counted Cross Stitch Show (NCCSS) competition. Interestingly, this piece received both my highest score (from Betsy Evans), as well as my lowest score (from infamous pottymouth Eileen Bennett). The difference in scoring was LARGE, and specifically based on the workmanship of my stitches, which is what makes it so very strange. You WILL see further discussion about this on INDEPENDENT NEEDLEWORK NEWS at a later date; right now, I am still working on my research for that post.


Today was a beautiful, sunny, and warm day here. I took advantage of the good light to take some better pictures, so now I can share my finished Workstation with you.

Here's a good picture showing the largest hedebo loop I've ever made, LOL -- the ribbon from the base goes through the hedebo loop and is then tied in a bow to keep the Workstation closed.


Here's a side view of it closed ... You won't get a back view because I managed to glue my hinge on a bit crooked. ;>) Perhaps someday when I locate my glue gun, I might fix that part (which would also keep the base more securely attached than I think it is right now).


This is the Workstation opened halfway, with the pin cushion removed. My pin cushion is a bit lumpier than I would like, but that is one of the things that makes it mine!


Next is a closeup of the hedebo loop used to keep the needlebook closed.


Here is a closer look at the needle pages -- already in use, too!


And last, but not least, a picture of the Workstation opened all the way.


This truly was a joy to stitch! The finishing was much easier than I had thought it would be; Judy's instructions made me feel like I could do anything I set my mind to, and the other stitchers in the class were an invaluable resource, too. I am thoroughly looking forward to finding out what Judy's next class offering will be!

Wednesday, November 08, 2006

Minor Happy Dance

I finished all the stitching for Judy O'Dell's My Treasures Workstation, though not quite in time to really work along with the other stitchers who were finishing their Workstations over this past weekend. Instead, I was lucky enough to be about two days behind them, which meant I got extra clues on what to do and how to do it from them. Thanks to following in their expert footsteps and Judy's wonderful instructions and encouragement, I managed to do all of my finishing (except the pin cushion, which I did the night before to practice the joining stitch Judy used in this project) on Monday. But more on that later.

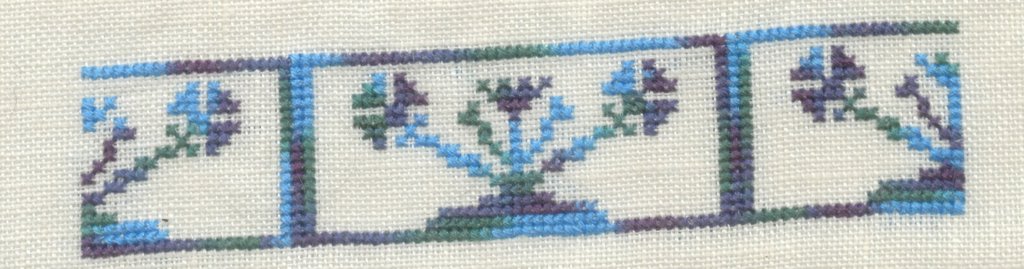
The hinge was the quickest part of this project for me to stitch, partly because I made no changes to the charted hinge.


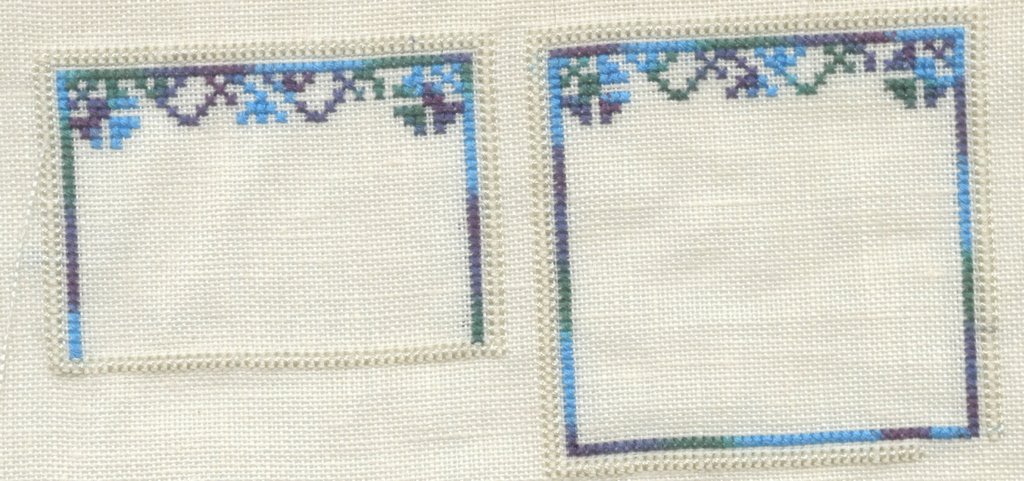
I'm feeling a bit conflicted about my needle pages. During the finishing, I put the smaller (top) one on my Workstation upside down from how the instructions called for it to be (I hadn't realized until my needle pages were already attached that the top one was supposed to go on a different way ... which would have created the image of a square with the top half of the square on the top needle page and the bottom part of the square on the bottom needlepage). Once I figured out my mistake, I wished I had put a row of rhodes butterflies across the top of the smaller needle page to make it look like I did it "wrong" on purpose. In fact, I did consider adding butterflies to the needle pages but figured it would be too heavy of a stitch on my somewhat flimsy fabric, especially for pieces that were going to be loose on three sides. Had I stitched the butterflies across what is my top of the smaller needle page (both needle pages are pictured here upside down from how I put them onto my workstation, so imagine butterflies straight across from the flowers in the blank area, and you'll know where I now wish I had put butterflies), they would have been close enough to where the needle pages attach to the Workstation that they wouldn't have been too heavy ... oh well, I'm certainly not taking it apart now! Actually, I am quite happy with having done it differently than the instructions called for, just because that is another part that makes it uniquely mine ... but I still feel conflicted because I could have made it even more mine. ;>) So, my needle pages are stitched almost as charted (I reduced the size of the four sided stitches around the border to make the finished needle pages look daintier), but the smaller one is installed "wrong." LOL.


And here are the top and bottom of the pin cushion, which would be identical were it not for the variegated thread. I replaced cross stitches with the closed herringbone and rhodes butterflies on these.


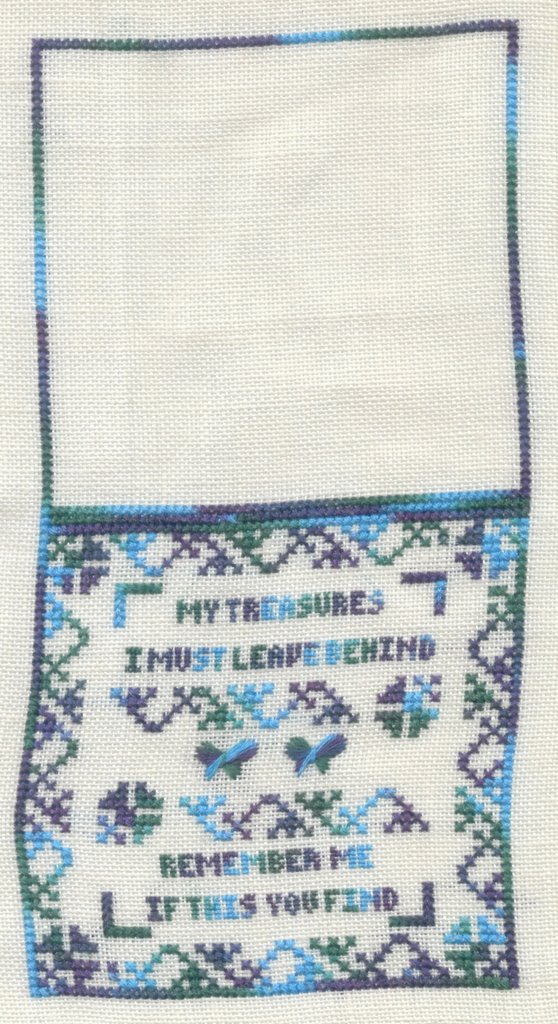
The base was the hardest part for me because it involved centering lettering, which, as I mentioned previously, is not one of my strong suits. I did the math, but incorrectly, as I originally intended to include my middle initial until I found while stitching that it wouldn't fit. Then I still had to edit the last letter from the way it was charted; otherwise, I would have had to rip out my last name. (How fortunate I am that my last name is only three letters long! Otherwise, I would have had to center lettering on two different lines, LOL.) However, I am happy with the result, and also happy I was able to center lettering without having to rip it out more than once (I didn't determine that the middle initial was too much until after I had already stitched it) -- I think that is a first for me. The lone rhodes butterfly is my addition to this chart; I thought about doing a few more, but this was the last piece I stitched and I was eager to start the finishing process. (I managed to get the butterfly centered on the first try again. One thing I love about stitching is that I constantly amaze myself, LOL. Woohoo ... I can count! Sometimes, anyway ... )

I'll show you my finished Workstation in my next post. I do have pictures of it already, but am hoping for a less dreary day to try taking better ones. ;>)

Monday, October 30, 2006

Moving Right Along

Here is the needlebook outside from Judy O'Dell's My Treasures Workstation. Again, I've replaced cross stitches with closed herringbone and rhodes butterflies.


I'm starting to get bored working only with this fiber, beautiful as it is. However, the finishing class for this project is next weekend, so I'm going to keep going with the stitching!

Saturday, October 28, 2006

Next Part of My Workstation

I completed the second part of Judy O'Dell's My Treasures Workstation, which is the inside of the needlebook.

I again switched some cross stitches to closed herringbone, and added rhodes butterflies into empty spaces.

I'm keeping this picture small at Judy's request. I'd love it if you find these pictures attractive enough to contact Judy about taking the class yourself!


By the way, I neglected to mention earlier that I'm stitching this project on Zweigart's 32 count cream Belfast.